Overview
This guide outlines how to configure the BridgeGate platform to use SSL for the BridgeGateHTTP and BridgeGateWebServices Adpaters. This guide is written with the assumption that the user has sufficient knowledge of the setup and configuration of the core BridgeGate TEI Service.
Configuring SSL for use with the BridgeGateHTTP and BridgeGateWebServices Adapters
Modify the following file:
\bridgegate\server\conf\server.xml
The default configuration is commented out. Uncomment the SSL/TLS Connector section and modify as required based on your installation of the BridgeGate Server.
Sample entry ONLY below:
<!-- SSL/TLS Connector configuration using the admin devl guide keystore -->
<Connector port="443" address="${jboss.bind.address}"
            maxThreads="100" maxHttpHeaderSize="8192"
            emptySessionPath="true"
            scheme="https" secure="true" clientAuth="false"
            keystoreFile="${jboss.server.home.dir}/conf/databridgeservicehccert.p12"
            keystoreType="PKCS12"
            keystorePass="12345" sslProtocol = "TLS" />
To close off access via the standard HTTP ports of 80 or 8080, then comment out the following section:
<Connector port="8080" protocol="HTTP/1.1"
connectionTimeout="20000"
redirectPort="8443" />
The bridgegate.xml file will also need to be modified if the default HTTP port is not enabled. The file can be found in \bridgegate\conf\bridgegate.xml. Modify the following line appropriately:
<SERVER_CONFIG ALIAS="BG_Server01” MAX_CONCURRENT="5000" MAX_DATASTREAM_CALLWORKFLOWS_TO_DISPLAY="50" MAX_MEMORY="1400" MAX_POST_SIZE="1000000" SERVER_URL="http://localhost:8080/" SHOW_PORTAL_WARNINGS="TRUE"/>
Example Edited Record:
<SERVER_CONFIG ALIAS="BG_Server01” MAX_CONCURRENT="5000" MAX_DATASTREAM_CALLWORKFLOWS_TO_DISPLAY="50" MAX_MEMORY="1400" MAX_POST_SIZE="1000000" SERVER_URL="https://localhost:443/" SHOW_PORTAL_WARNINGS="TRUE"/>
Creating the SSL Certificate Keystore
Use openSSL to generate the cert request and key file.
The following examples are what were used to create the SSL certs for BG’s test and prod environments. Change the highlighted elements as needed for each specific situation.
openssl req -new -newkey rsa:2048 -nodes -out bgtestedi_bg_net.csr -keyout bgtestedi_bg_net.key -subj "/C=US/ST=Florida/L=St.Petersburg/O=BG/OU=IT/CN=bgtestedi.bg.net"
openssl req -new -newkey rsa:2048 -nodes -out bgedi_bg_net.csr -keyout bgedi_bg_net.key -subj "/C=US/ST=Florida/L=St.Petersburg/O=BG/OU=IT/CN=bgedi.bg.net"
openssl req -new -newkey rsa:keysize -nodes -out common_name.csr -keyout common_name.key -subj "/C=US/ST=State/L=City/O=Organization/OU=Department/CN=common.name"
The following site can be used to generate the openSSL command line.
https://www.digicert.com/easy-csr/openssl.htm
Two files are generated, common_name.key and common_name.csr.
Deliver the csr request to the Signing Authiority, and a signed certificate file will be returned.
Browse to the following URL: http://code.google.com/p/keytool-iui/ and download and execute the keytool-iui.jnlp utility.
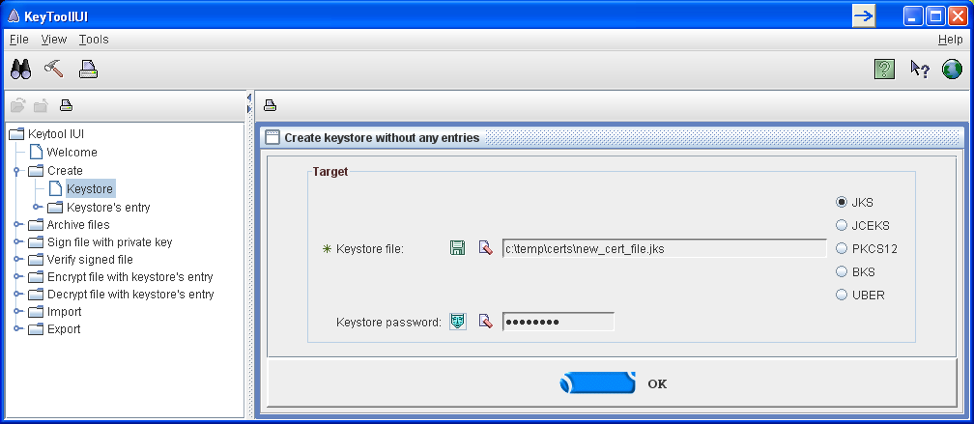
Select Create…Keystore.

Enter the path and filename and password for the of the new keystore, click Ok.
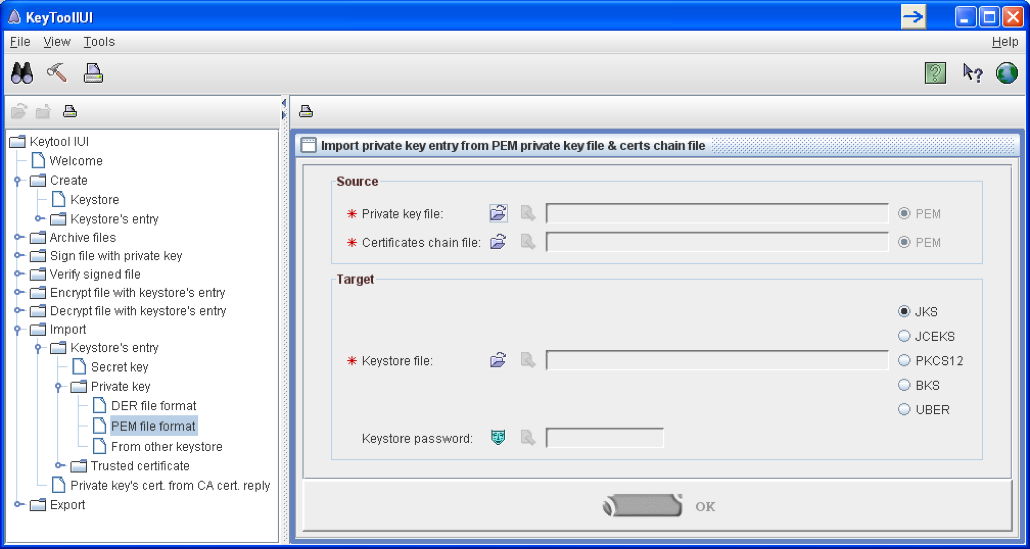
Then select Import…Private Key…PEM File Format:

Private Key File is the common_name.key file created by openSSL.
Certificates cain file is the signed file returned by the signing authority.
Keystore file is the keystore you just created.
Enter the keystore password from the previous step.
Click Ok.
Move the keystore file into place and modify the appropriate bridgegate cfg files as noted above to update the location and password of the new keystore.